
My First Venture into 3D Printing
Oct 7, 2013 · CommentsThe Harold Washington library, located in Chicago just a few blocks away from me, has opened a 3D printing lab. I was able to go a couple of weeks ago and had a great experience!
3D printing is the process of creating a three-dimensional object from a digital model. It’s an additive process, wherein successive layers are laid down in order to create the final shape (rather than cutting away at a larger initial shape). This is becoming increasingly popular as printer costs come down (currently $2-3k or so) and more people are made aware of the technology. While the tech is still evolving, right now it’s possible to create all sorts of neat things - from jewelry to working tools.
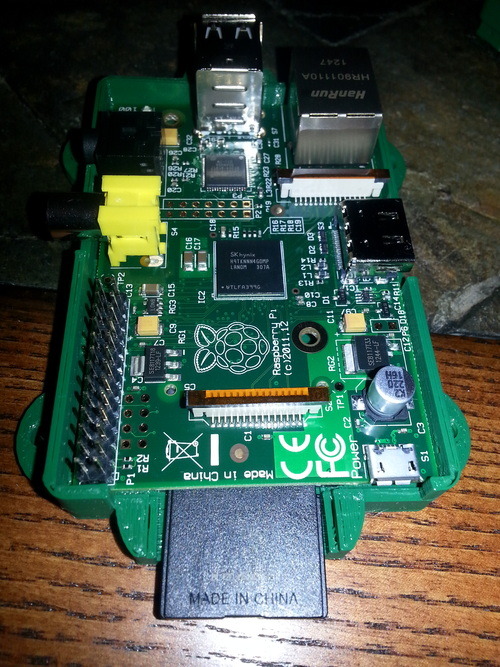
I knew I wanted to try 3D printing something, but I wasn’t sure what I wanted to do initially. Fortunately a few weeks before I had won a Raspberry Pi (tiny credit card sized computer). The Pi is sold without a case - bingo! Here’s the Pi board. As you can see it’s very fragile! I realized a practical item to try printing would definitely be a case for it:
One of the really neat things about the 3D printing movement is the sharing of designs that people create. A couple quick searches on Thingiverse.com and I had found my case! Upon entering the lab, I was instructed to load my design onto an SD card. Using one of the provided laptops, I did just that - using some open source software I exported it to the card. There were three Maker Bot Replicator 2’s. They were very easy to use - essentially just pop the SD Card in, choose the print option from the digital menu and the machine begins.
My case consisted of two pieces snapped together - so I started printing the bottom first. This part went rather smoothly, completing in about 40 minutes. Attempting to print the top portion, however, did not go as well. While these machines are certainly very robust, patience is required - they can and do randomly fail, get jammed, overheated, etc. In my case, on one occasion it got jammed and on another the platter was not level enough, resulting in a lop-sided print. We ended up getting really close to the end of day - luckily on the last try it finally printed correctly. Here it is in action:
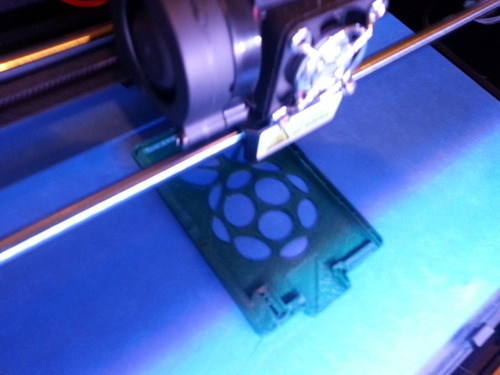
and a short video:
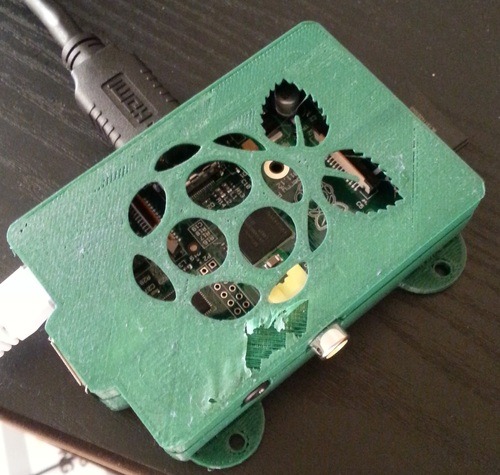
Here is the final result, put together. The bottom print also took only about 30 minutes. Total time for both, including failures was 3 hours at a cost to me of $3 (for the acrylic material that the case consists of). I’m very happy how it turned out!
I had a great experience at the Chicago Maker Lab and can’t recommend it enough. It’ll be exciting to watch the technology evolve - faster, more reliable printing times, decreased costs passed on to consumers, and unlimited possibilities for what people can print.